

If you’ve never heard of MidJourney, it’s an exciting AI tool that allows you to generate images and artwork quickly and easily. As I’m about to show you, Midjourney can help you generate images for just about any purpose, including:
- Creating images for articles, social media posts, or LinkedIn updates
- Enhancing presentations with unique and consistent visuals
- Designing stickers quickly and easily
- Generating visuals for company values or branding, even in cases with licensing restrictions
- Generating ideas and web design concepts
- Making illustrations for books, comics, or any creative project.
- Generating maps for Dungeons & Dragons or other tabletop games
But first, I’ll walk you through the very basic steps to get started with MidJourney and share some insights into its usage. Let’s dive in.
How does MidJourney work?
MidJourney is an innovative platform that leverages the power of AI to create stunning images based on your prompts. It integrates with Discord, a popular communication platform, to provide you with an easy way to access its capabilities. While it may sound a bit complex at first, don’t worry — we’ll break down the process step by step.
Getting set up with MidJourney
Step 1: Sign up and log in
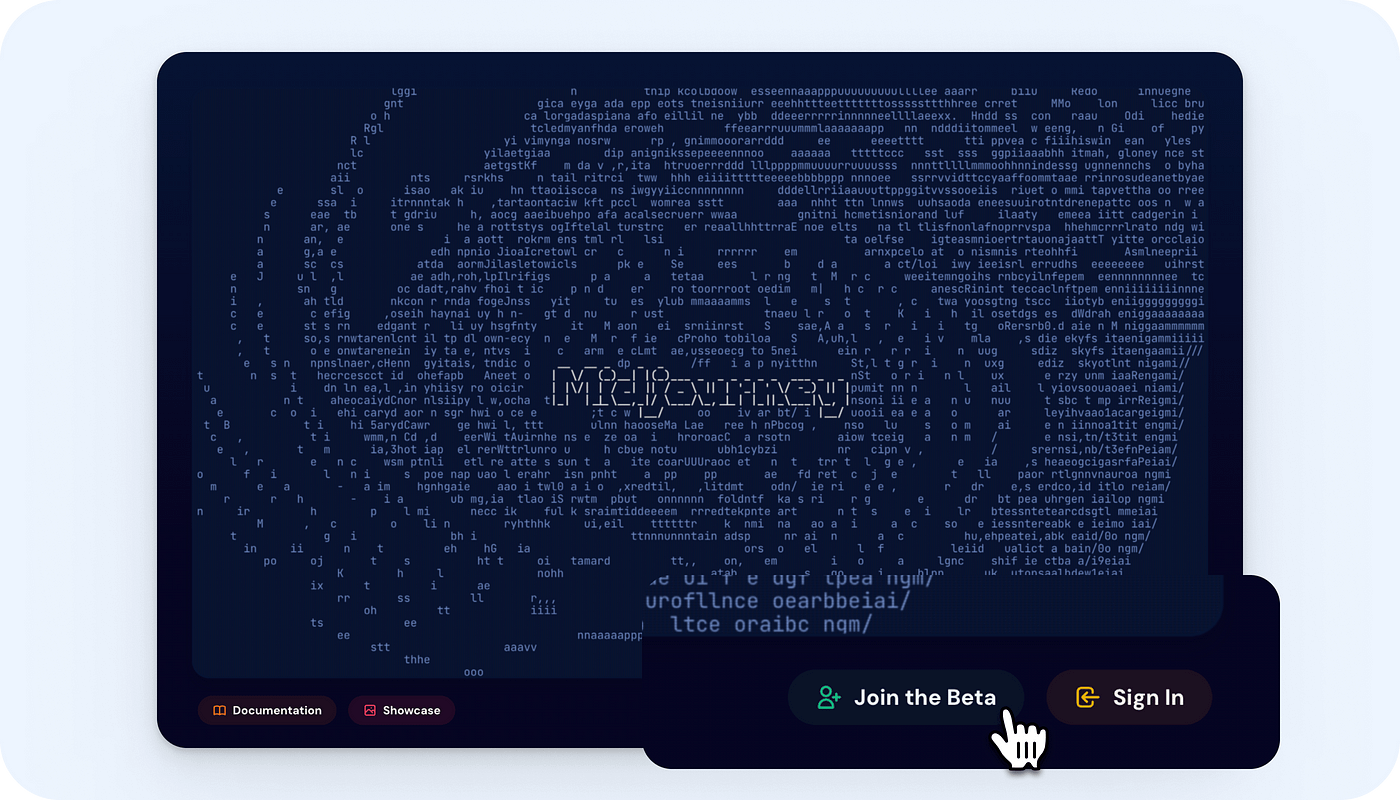
Start by visiting MidJourney’s website, and click to join the Beta program (or sign in if you’re already a user).
Step 2: Set up your Discord account
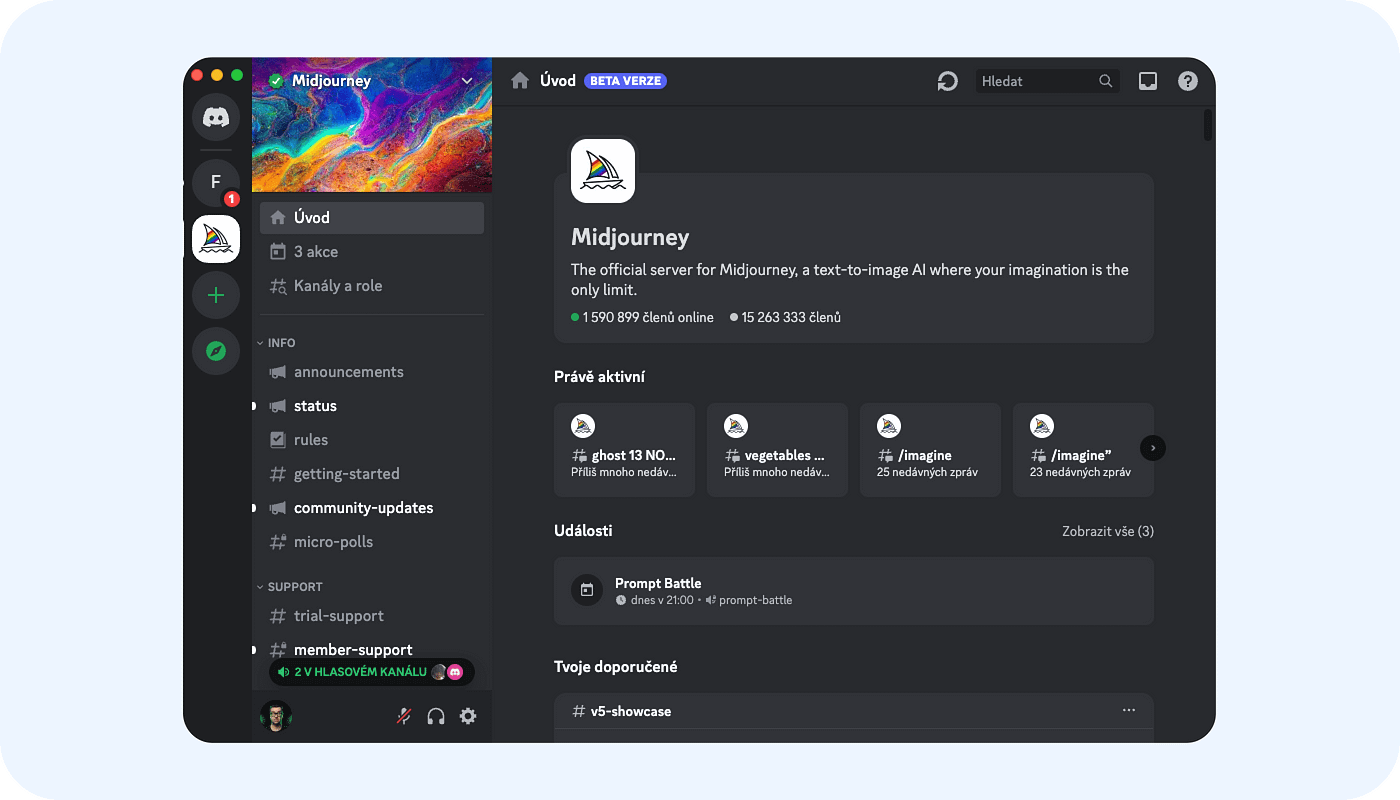
As I mentioned earlier, you’ll need a Discord account to use Midjourney. This might seem unusual, but that’s how you’re able to send prompts to Midjourney and generate images. You’ll also use Discord to create content galleries and if you get the mobile app, you’ll be able to generate the wildest images to show friends when you’re sitting at the pub.
Step 3: Choose a pricing option
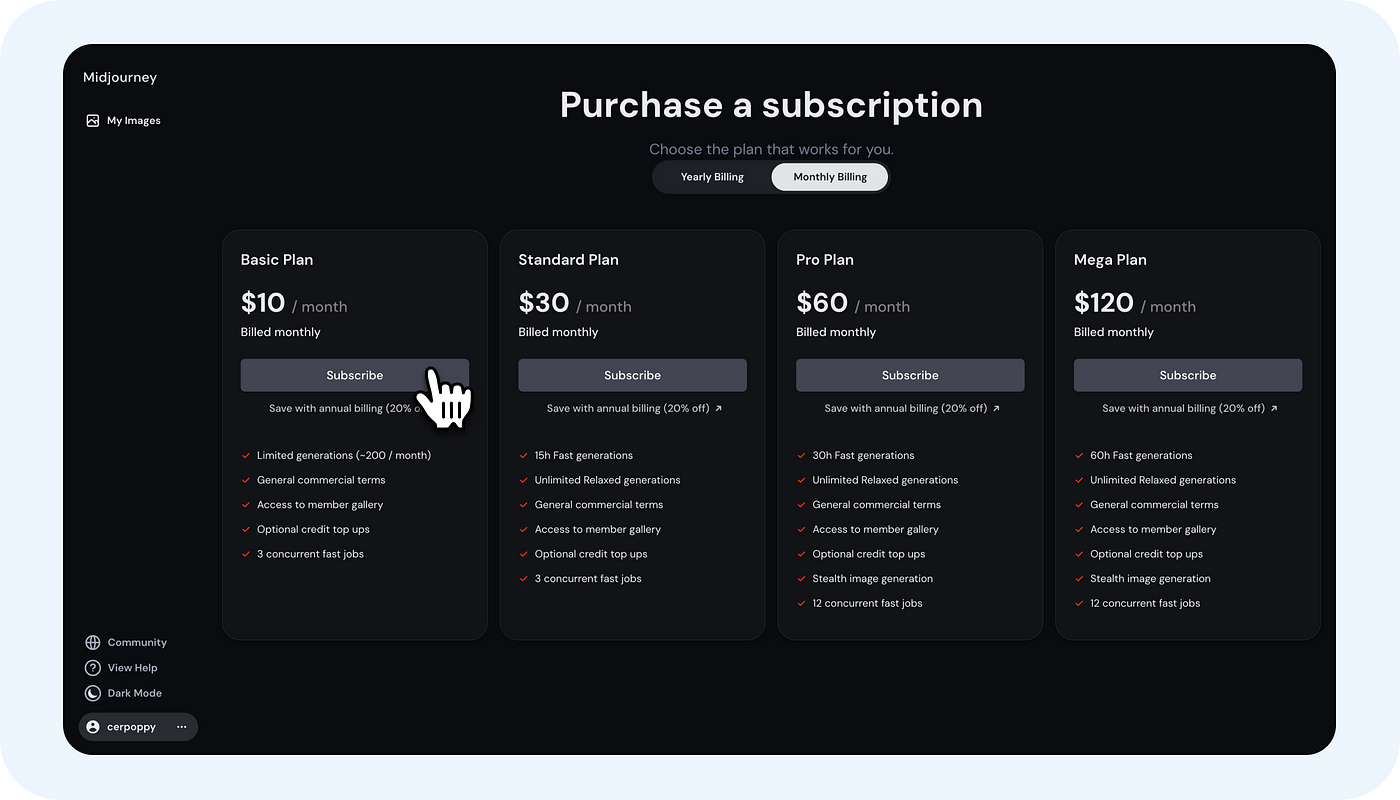
It’s important to note that MidJourney is not a free service. You have to choose between the Basic plan for $10 per month and the Standard plan for $30 per month. (You can also choose to pay annually.)
The main disadvantage of the Basic plan is that it offers limited server time, giving you up to 200 minutes of usage per month. There’s no such limit for the Standard plan, but you can always start with Basic and upgrade later.
Before you pick a pricing option, also be sure to understand the licensing that best suits your needs. According to Midjourney, “you’re free to use your images in just about any way you want” (including commercial use) as long as you have subscribed to the service at any point.
But, if you’re an employee or owner of a company with more than $1M USD per year, you need a Pro or Mega membership for every individual using the service on your behalf. And you’ll need to check with your company’s legal department on whether it’s an approved tool.
Let me stress that I’m by no means a law expert. I’ll leave that to you — you can read all about Midjourney’s licensing here.
Creating Your First Image
Now that you’re all set up, the fun begins! It’s time to generate your first image.
Step 4: Open Discord and access the MidJourney Bot
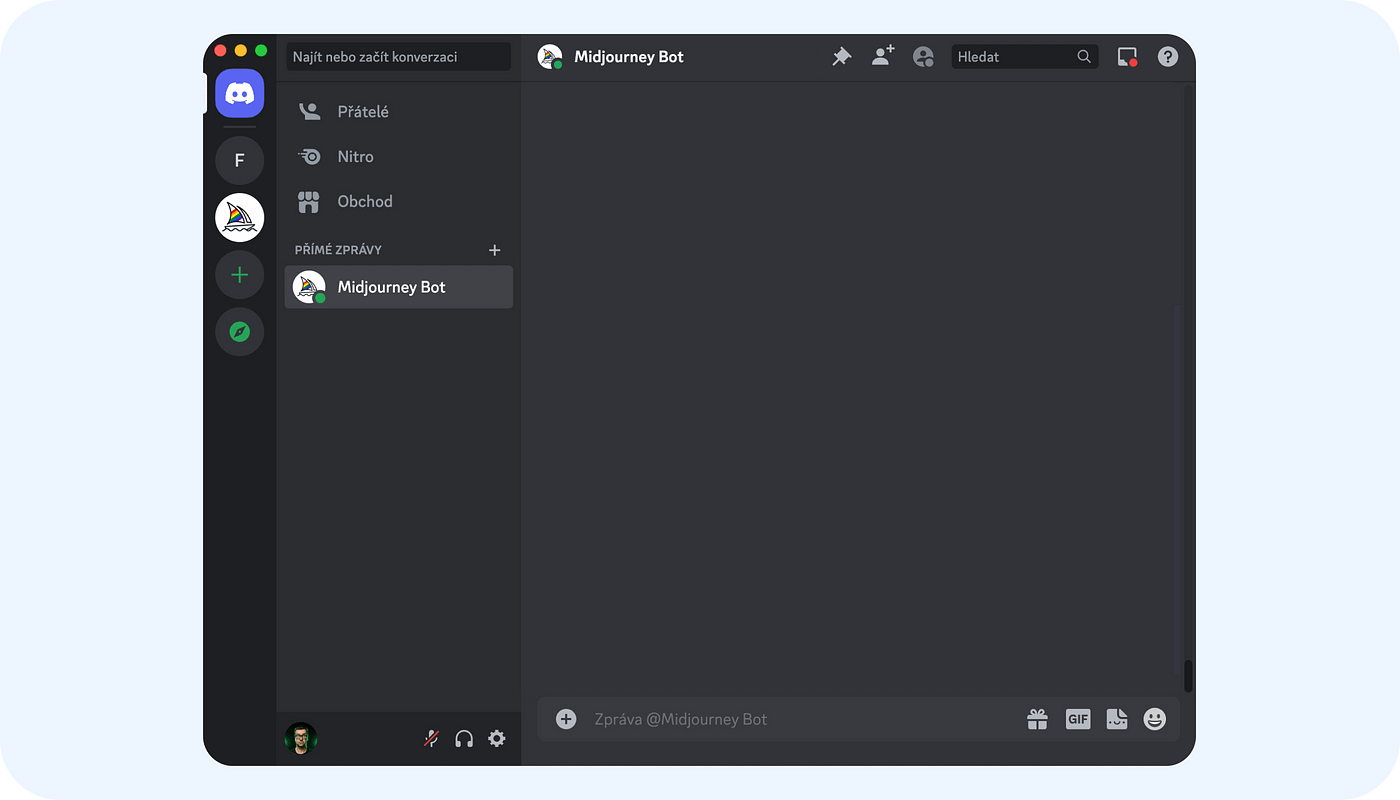
Open Discord and navigate to the direct message section. Here, you can find the MidJourney Bot.
Step 5: Generating your first image
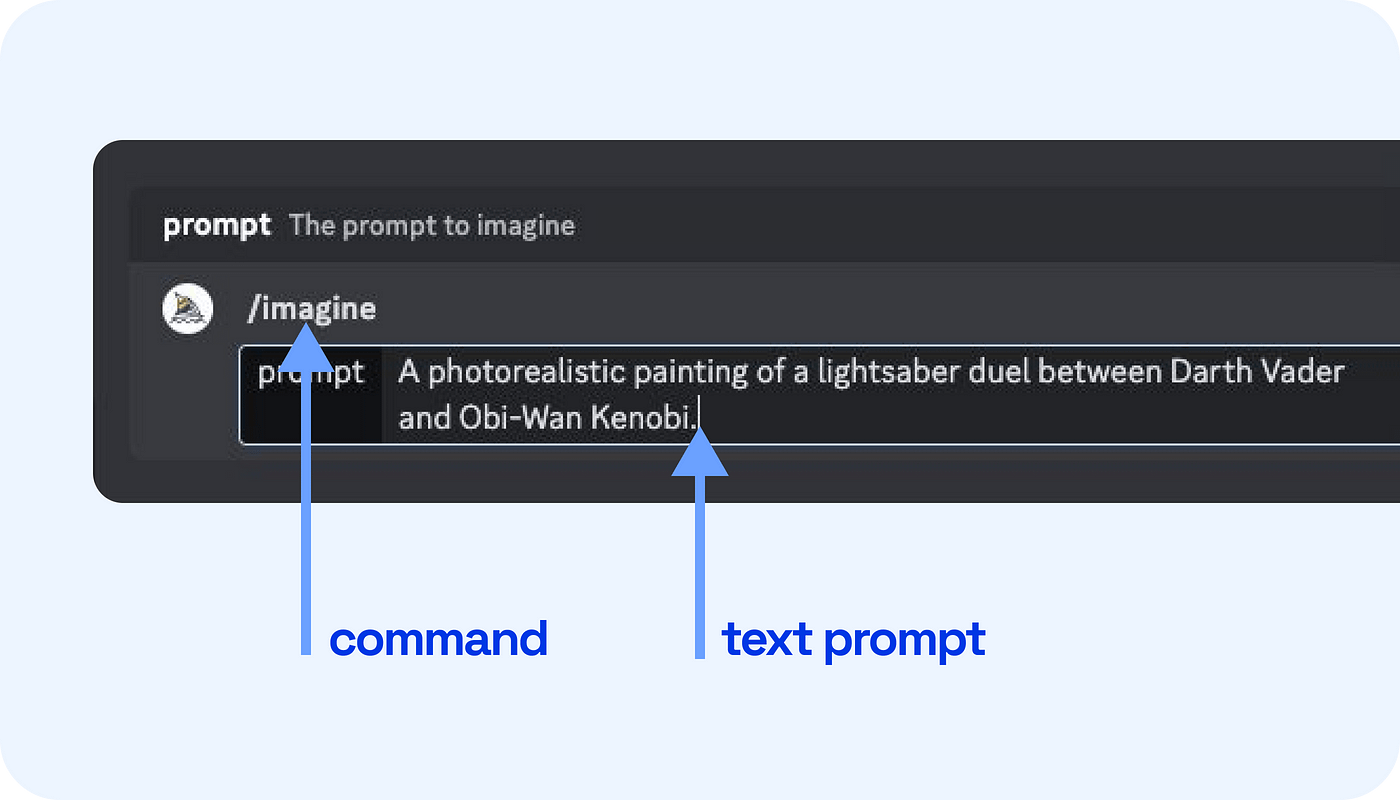
To generate an image, simply type the command “/imagine” in the message field and hit enter.
A text box will appear, allowing you to enter your first prompt. As an example, let’s go with this prompt for now:
A photorealistic painting of a lightsaber duel between Darth Vader and Obi-Wan Kenobi.
Step 6: Exploring the results
MidJourney will generate four images based on your prompt. Once you select your favorite image, you’ll have several options for what to do next:
- You can upscale it
- You can create variations of it
- Don’t like any of the four generated images? You can re-run the job.
For now, let’s choose one of the options (I picked the second option) and upscale it — click on U1, for example.
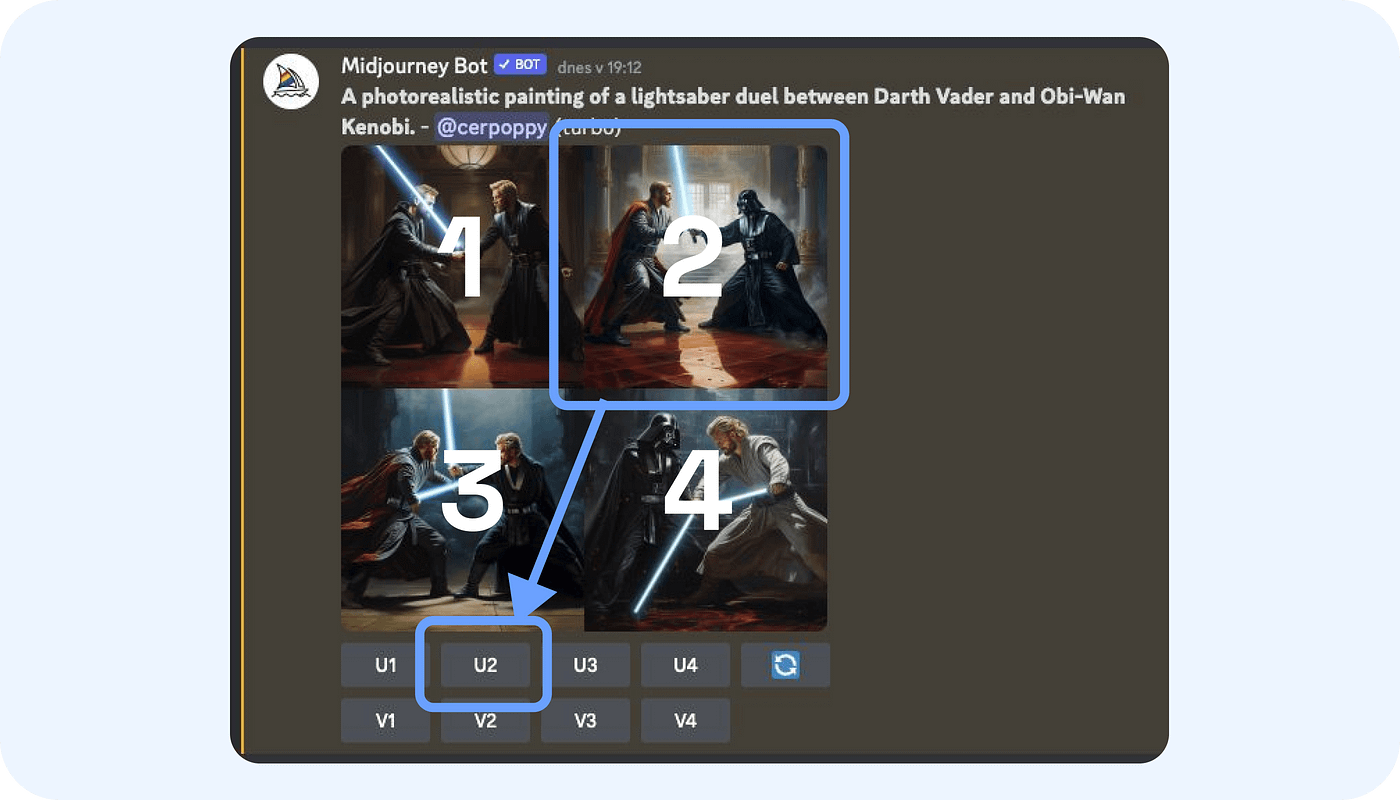
Upscaling will offer a better-quality version of that image that we can then modify in the next step.
Step 7: Additional Image Modifications
After upscaling your image, you have more options:
- You can create variations of the selected image.
- You can select a specific region of the image and write a new prompt for that area.
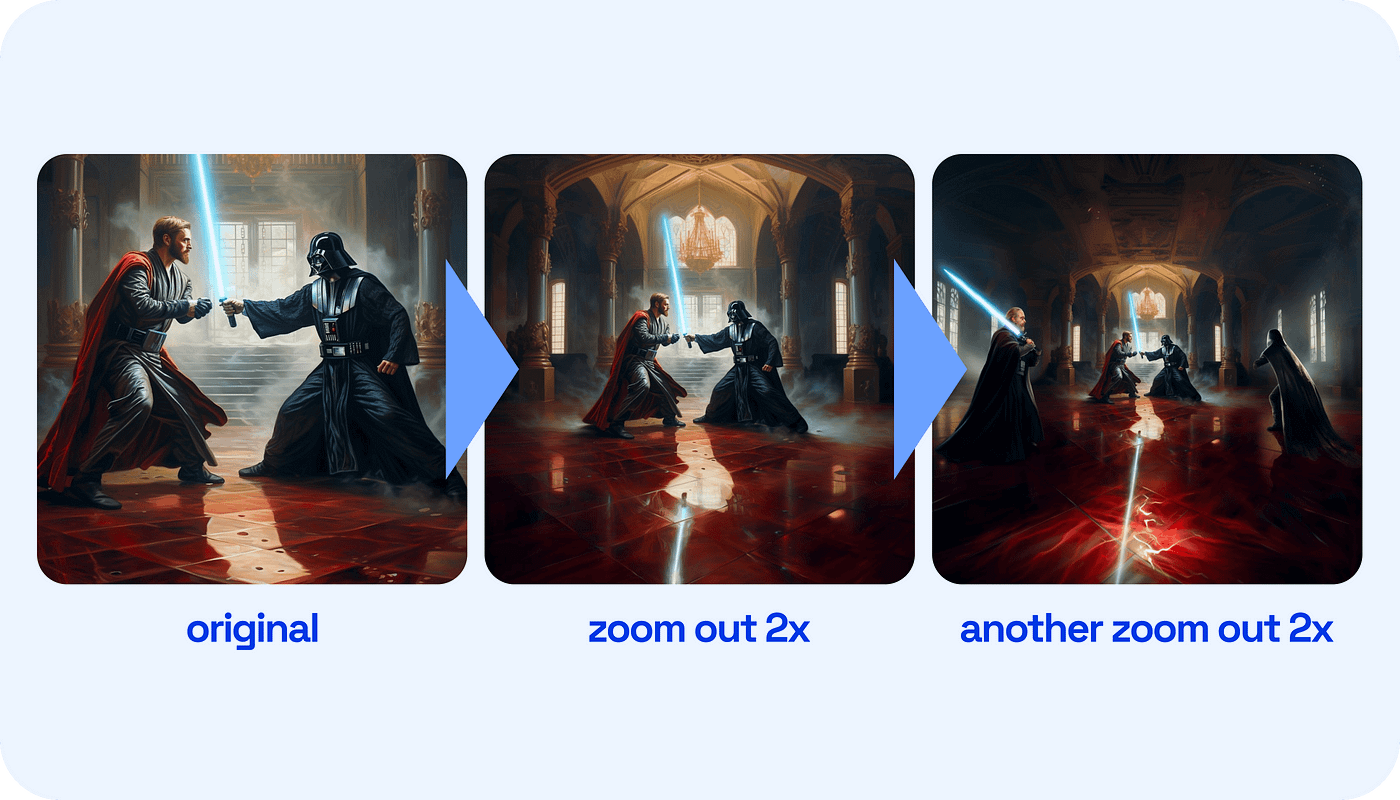
- You can zoom out (at a value between 1x-2x) to expand the canvas without changing the original content.
- You can pan to expand the canvas in a chosen direction.

For my purposes, I’ve decided to create a variation by clicking Vary (Region), to expand the canvas by selecting Zoom Out 2x, and finally, to pan the expanded canvas to the left by selecting the ⬅️ button.
The cool thing is that you can keep zooming out, panning, and varying as many times as you want. Here’s what happens when I zoom out 2x twice:
And here’s what happens when I pan to the left once:
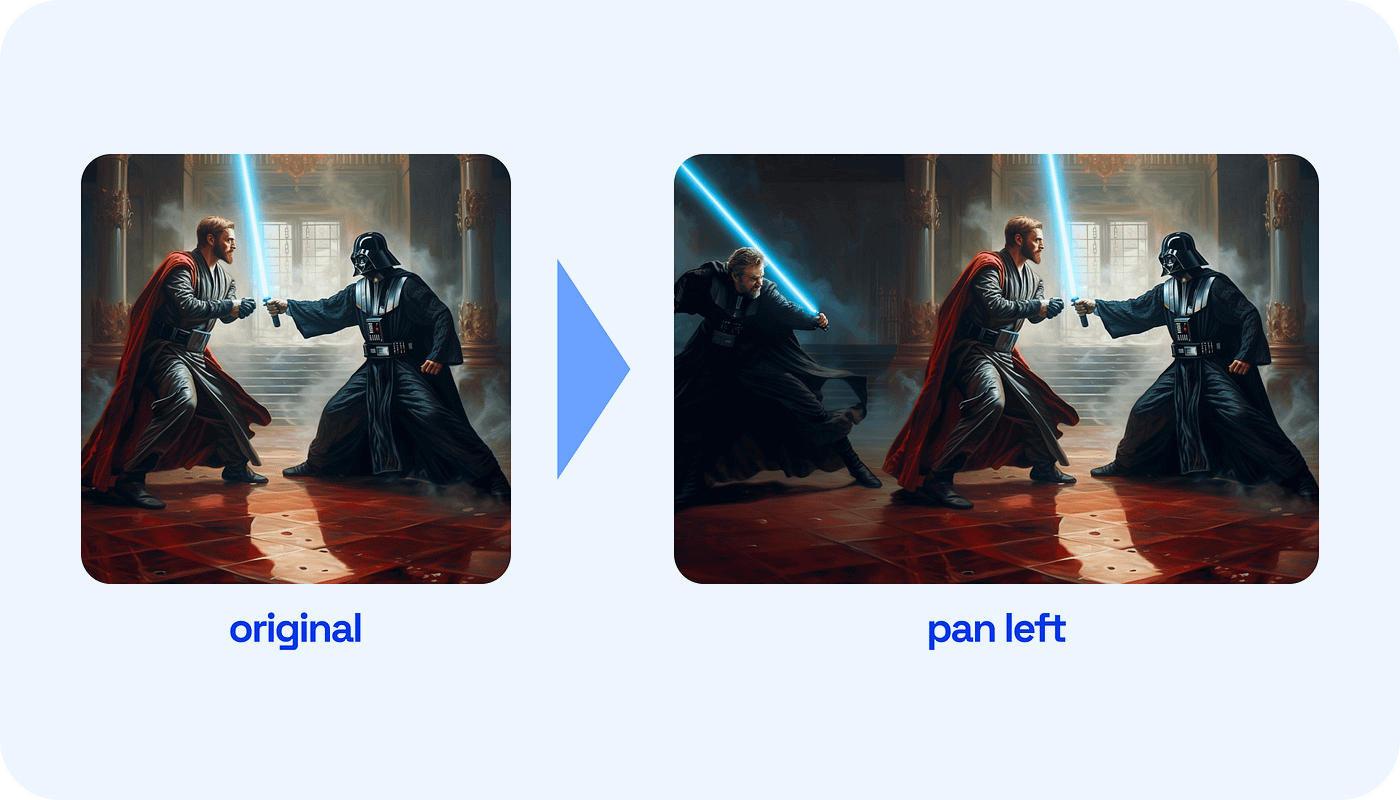
As you can see, MidJourney has added another dimension to my scenario, making it even more dramatic. What if I want to keep panning to the left, say, three times? Well, it gets even more interesting:

Let’s go back to the original image — say I decide I don’t want Obi-Wan Kanobe in the image at all. Instead, I want to go for a Mickey Mouse vs. Darth Vader saberfest. With Midjourney, that’s not an issue — that’s what the Vary (Region) option is for.
All you have to do is click on Vary (Region), use the selector to select the part of the image you want to vary, and write the prompt in there (“Mickey Mouse”, in my case), and press the arrow to submit.
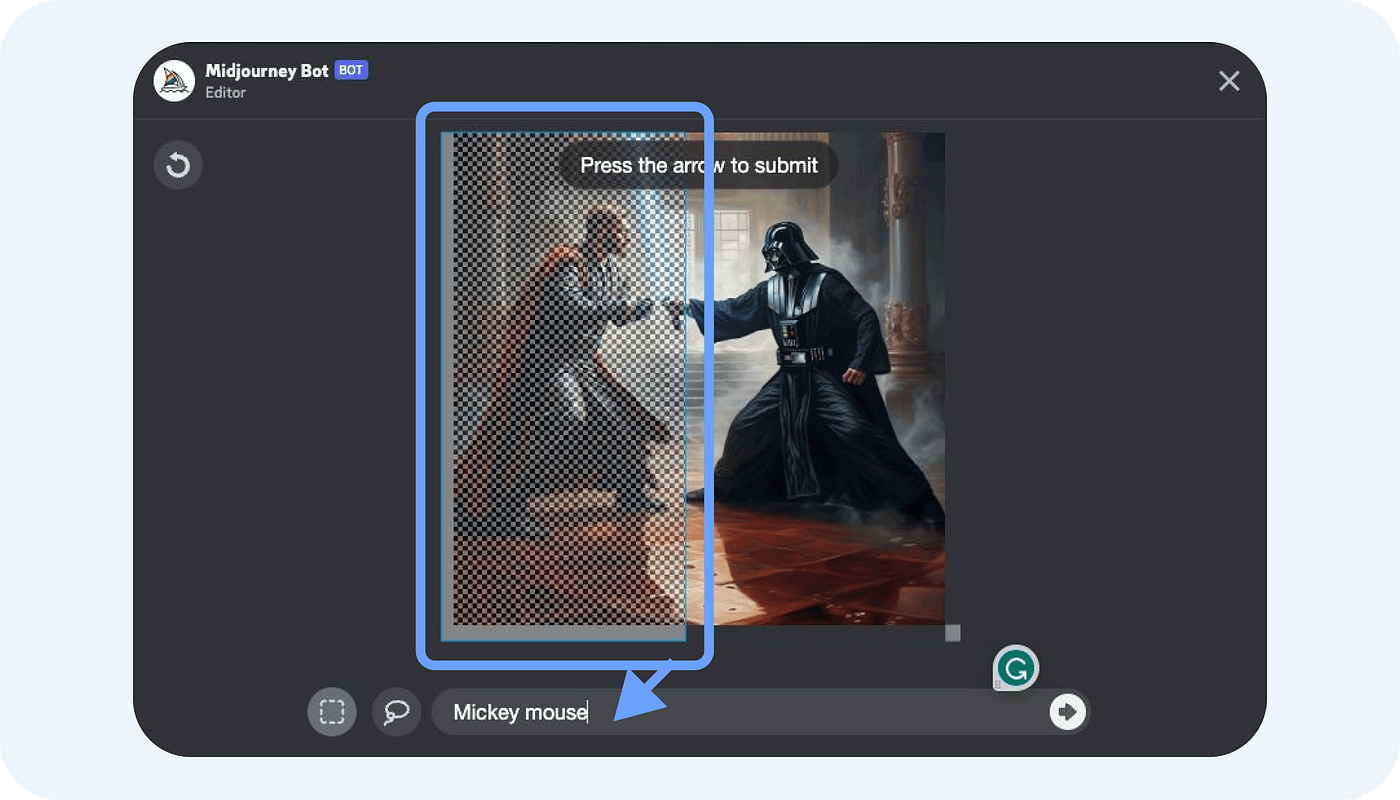
Within seconds, Midjourney grants my wishes:
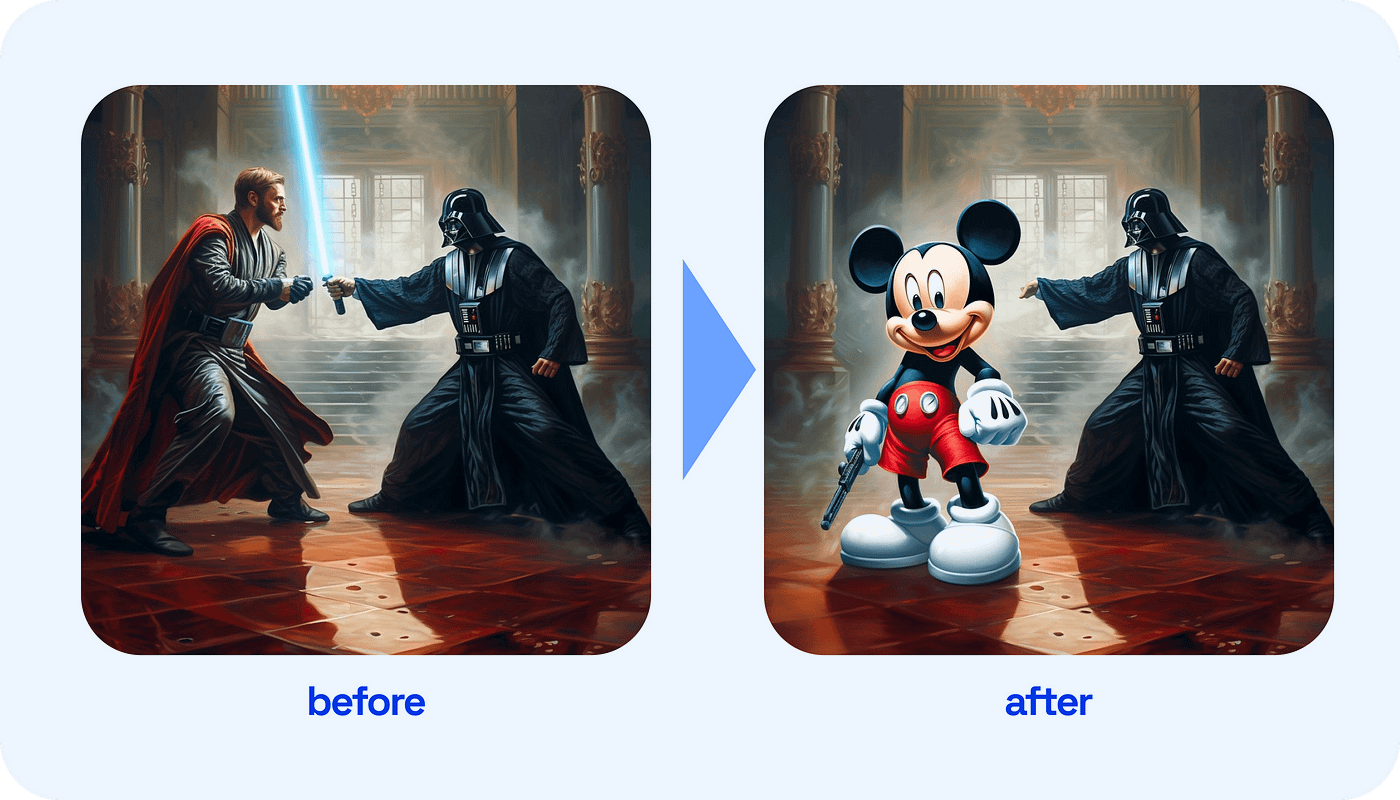
Now that’s what I call a Disney-Star Wars collab.
Understanding prompts
Prompts are essential for telling MidJourney what kind of image you want it to generate, and they can be the trickiest part of the process to wrap your head around. I’m not exactly a prompt expert, but I’ll share some key concepts I’ve managed to grasp.
There are two types of prompts:
- Basic text prompts, which can be as simple as a single word, phrase, or emoji
- Advanced prompts, which contain more details
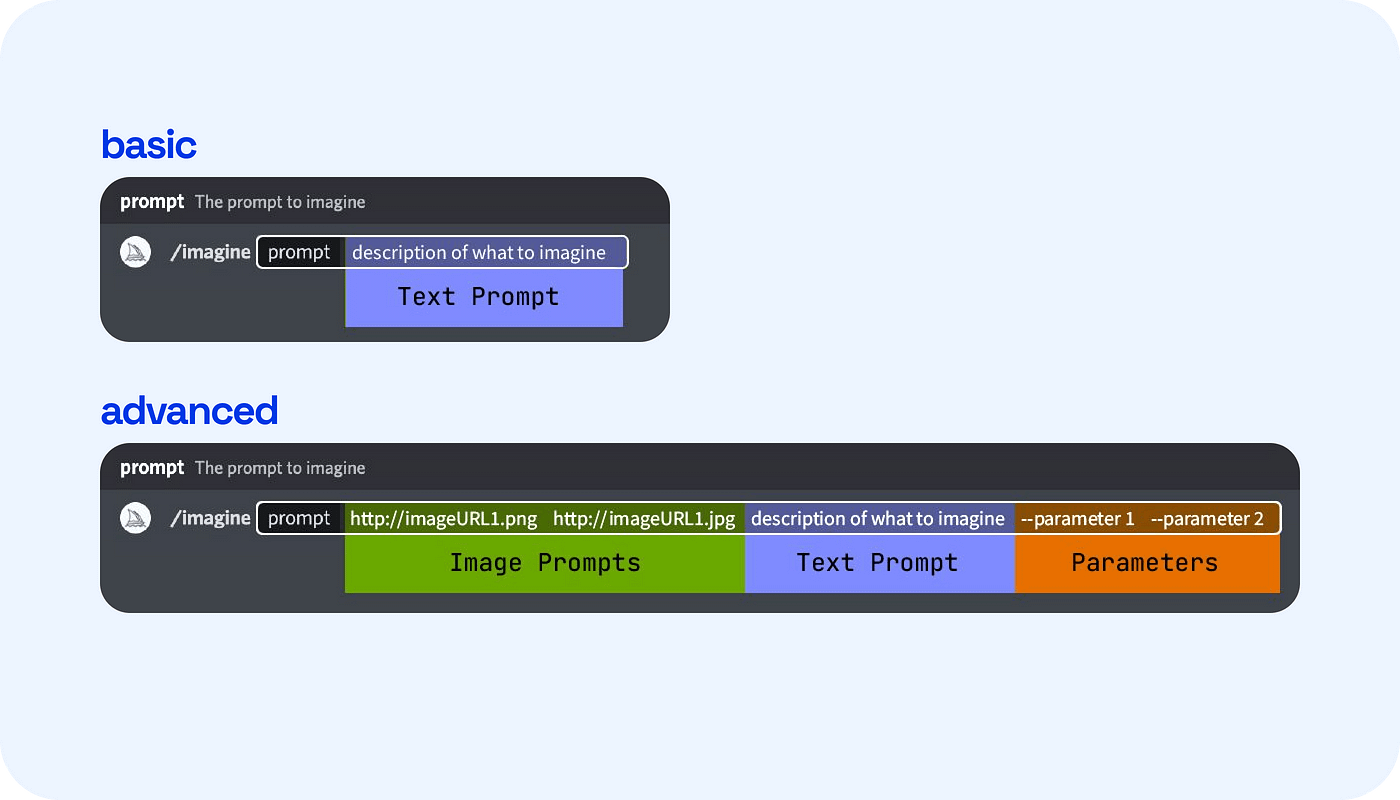
- Basic text prompts are similar to prompts you might use for other AI tools like ChatGPT: basically, a text description of the content you want to generate. For this, a handy tip is to use double colons (::) to indicate that parts of the prompt should be considered separately.
- Avoid long lists of requests. MidJourney Bot works best with simple, short sentences that describe what you want to see.
- If you want to try an advanced prompt, you can start with image prompts by adding a URL of your image at the beginning of the prompt. If you don’t have an image URL, you can upload an image to Discord, right-click on it, and copy the URL from the submenu.
- You can also can add parameters at the end of the advanced prompt to change aspect ratios, models, upscale values, and more. We’ll talk more about that in the next section.
Useful commands in MidJourney
MidJourney offers several commands to help you communicate with the MidJourney Bot so it can manage your tasks. Here are a few useful ones to know, with a description of what each command will trigger.
- /settings: View and adjust the MidJourney Bot's settings.
- /info: View information about your account and any queued or running jobs.
- /blend: Easily blend two images together.
- /describe: Upload an image you like, and the bot will describe it as a prompt, which can be useful for learning about prompts.
Improving your prompts (with examples)
Now that you understand the basics of prompts, parameters, and commands, you can further enhance your image results. It’s finally time to show you some of my favorite go-to prompts, with links to other great ones on the internet.
Style
You can specify a particular style for your image by referencing artists, designers, or specific looks. For example, you can use the command “style by Wes Anderson” to generate images in his distinctive style. Or if you prefer, you can explore MidJourney’s style library for inspiration.
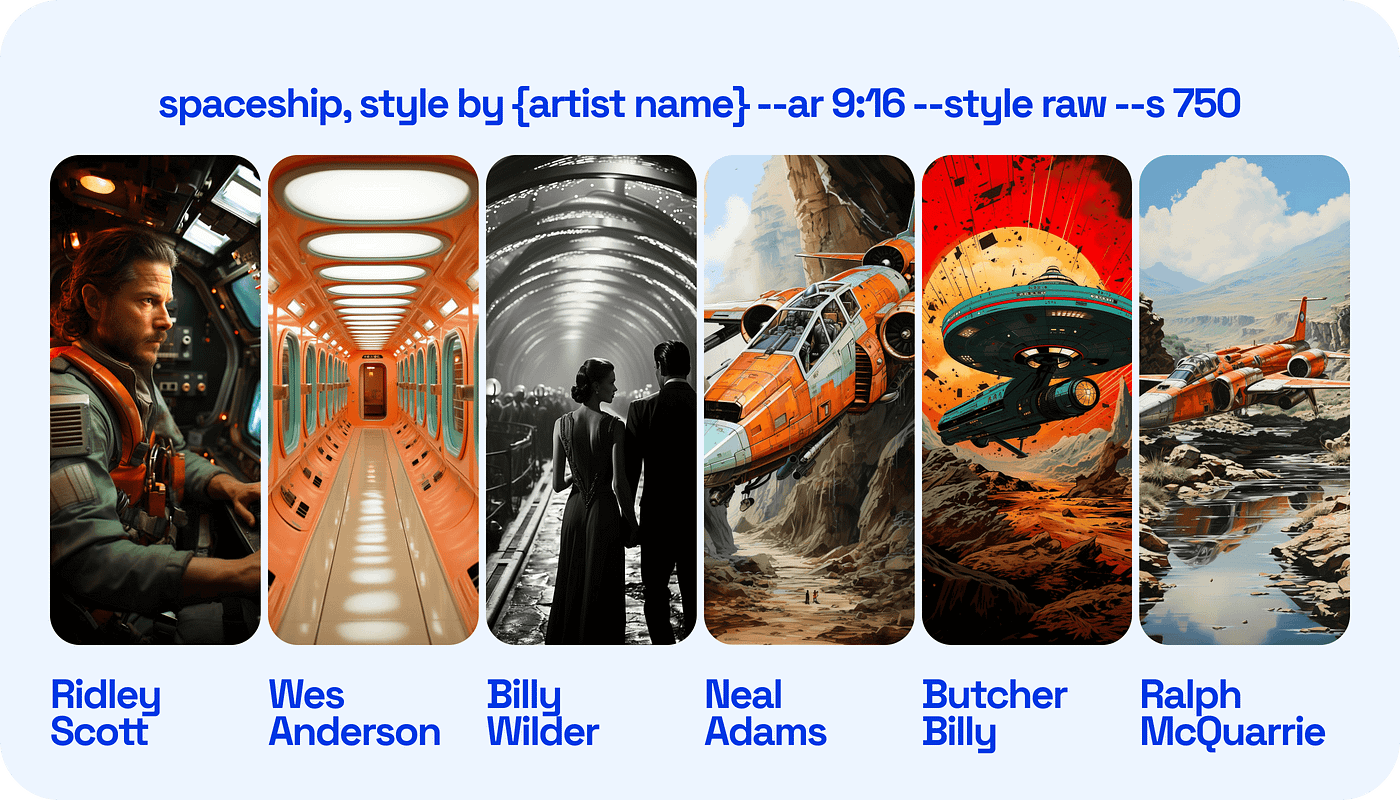
Prompt: spaceship, style by {artist name} — ar 9:16 — style raw — s 750
Time Travel
Specify a particular decade or era in your prompt to generate images with a specific historical context.

Prompt: {decade} car photo — ar 9:16 — style raw — s 750
Emotion & Color
Add emotion- or color-related words to your prompts to influence the mood and palette of the generated images.


Camera Angles & Cinematic Style
You can define camera setups, lenses, and cinematic styles in your prompts to create images with specific visual characteristics.
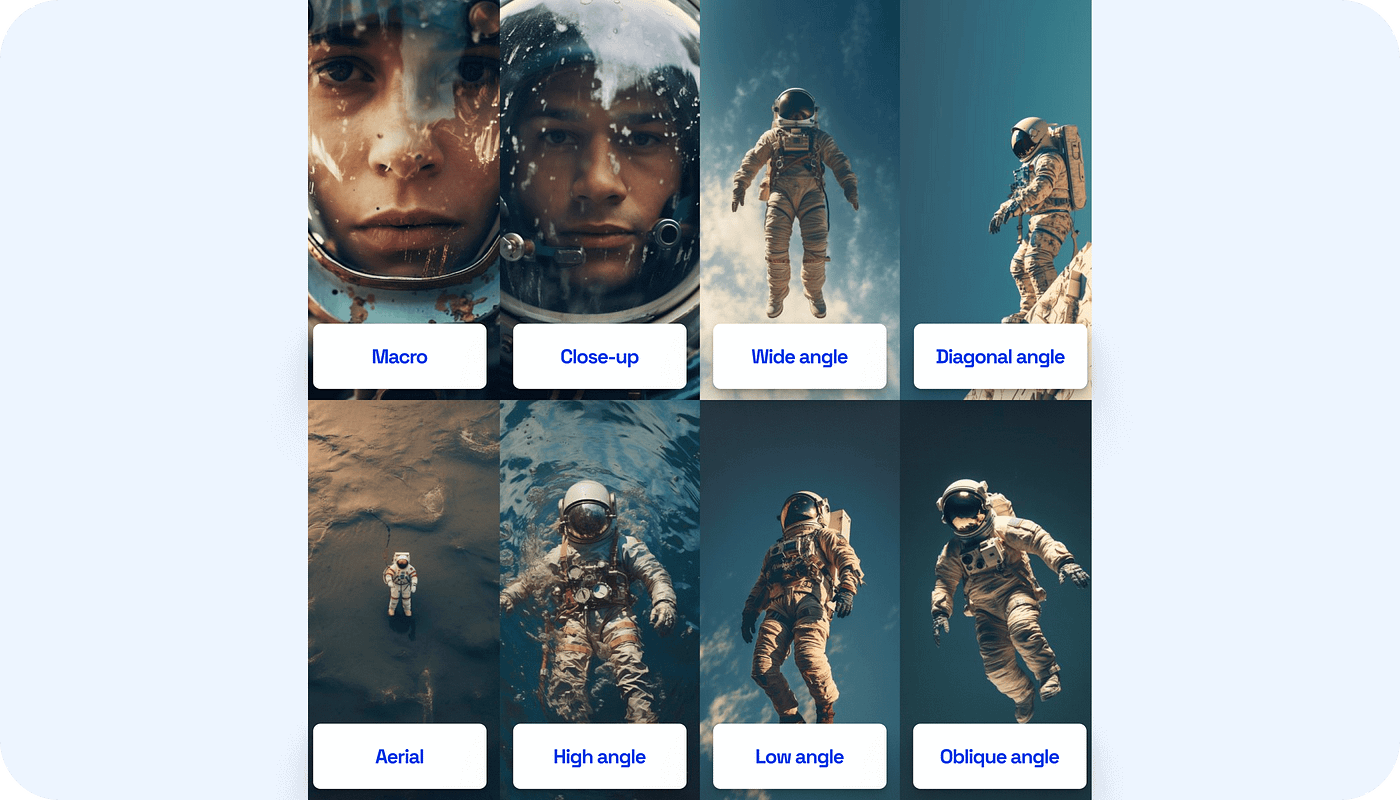
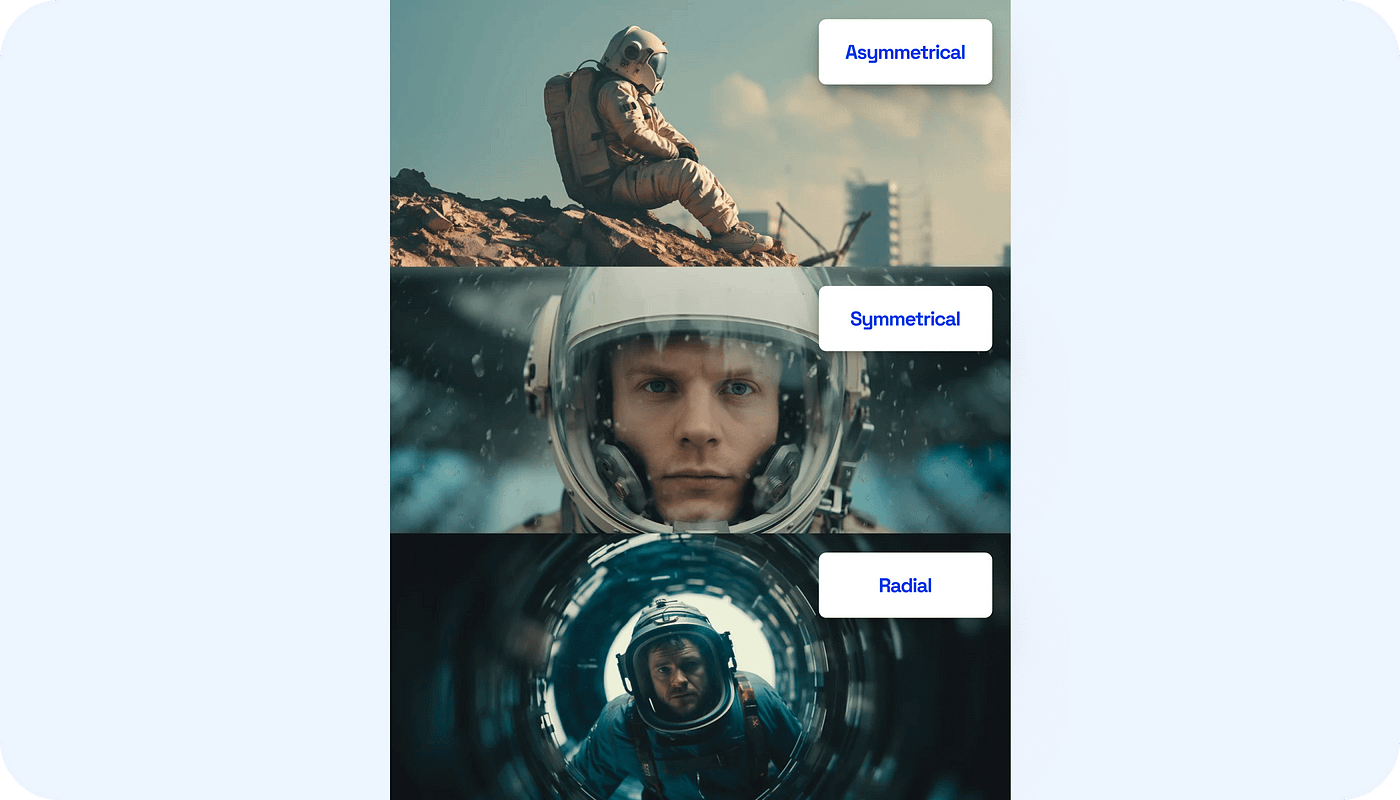
Source: https://twitter.com/ciguleva/status/1702556469336612909?s=20
Vector Illustration
MidJourney can generate images that resemble vector illustrations, and you can convert them into real vectors using other tools.
Prompt: png white background, woman listening to music sitting at the desk with her laptop, in the style of animated illustrations, studyplace, full body, text-based — style raw — ar 21:9 — stylize 250

Prompt source: https://twitter.com/chaseleantj/status/1699032024135463418?s=20
Historical Scenarios
Create prompts that generate images of historical events or settings... or selfies!
Prompt: Low angle realistic GoPro selfie of Sir Isaac Newton watching an apple fall under an apple tree — ar 21:9 — style raw

Prompt source: https://twitter.com/Mr_AllenT/status/1685284406540337152?s=20
Miniature Cities
MidJourney can generate miniature models thank to tilt-shift photography.
Prompt: Tilt shift photography of Venice, depth of view, sunny, stunning architecture — ar 21:9 — style raw

Prompt source: https://twitter.com/chaseleantj/status/1685379668596150272?s=20
Lego creations
I couldn’t resist! When you look closely, you can tell it’s not Lego, but hey, not bad for a robot-generated image that took seconds to create, right?
Prompt: Lego design, lime Chevrolet Corvette, red color background, hyper — detailed renderings, 3D render — ar 21:9
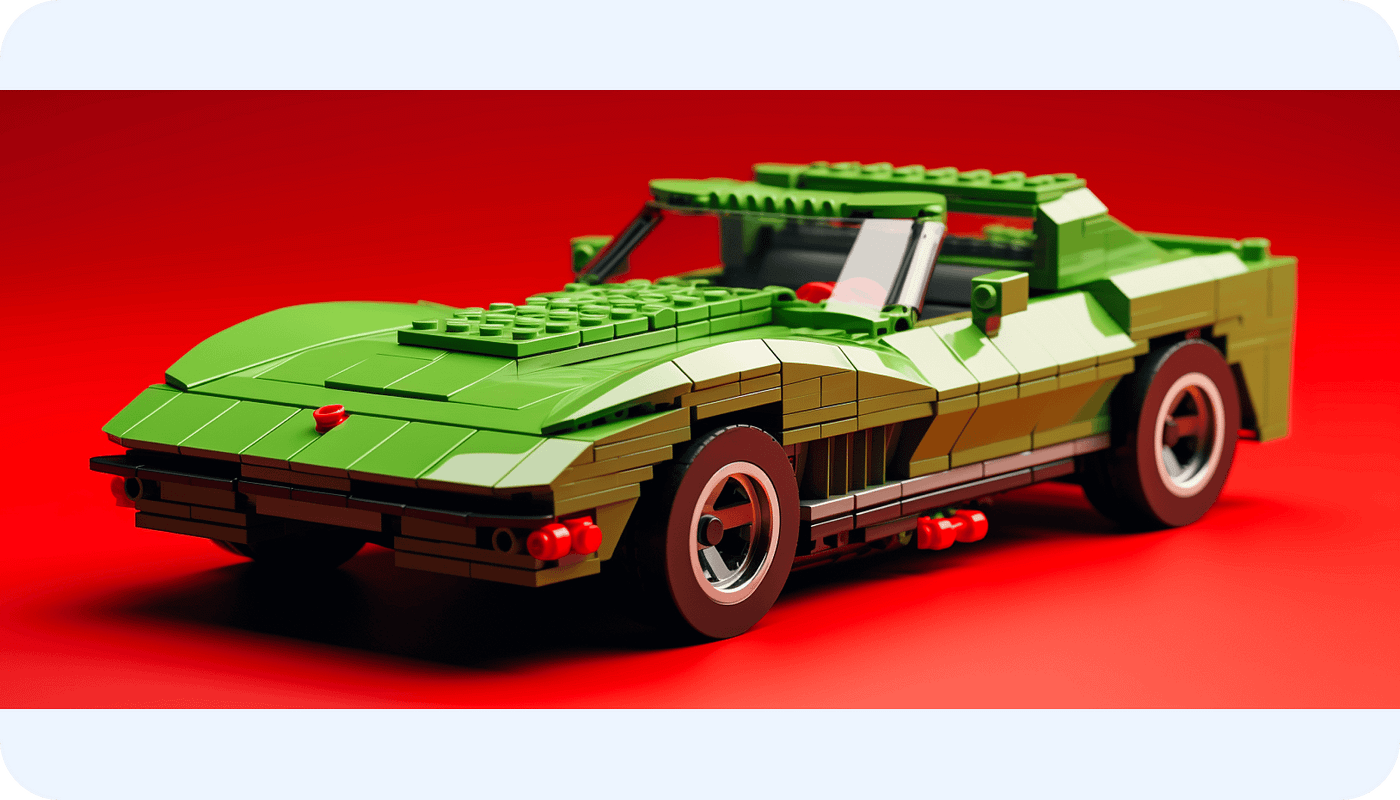
Prompt source: https://x.com/kalsonkalu/status/1674415758258892800?s=20
Interior design
Combine prompts to generate interesting design concepts.
Prompt: interior design in the style of Stanley Kubrick, white and blue — ar 21:9

Prompt source: https://twitter.com/umesh_ai/status/1702619079138562299?s=20
For more great prompts I found on Twitter, check out these links:
- Mixed-media photography
- Driver’s perspective
- Images in the style of Studio Ghibli
- Background for presentations, websites, etc.
- Controlling the composition of camera angles
- A long list of cinematic prompts
- Website and UI design
The AI-generated sky’s the limit
And that’s pretty much it for the basics that I’ve learned so far. I hope they’re helpful to you. If you want to really master the art of MidJourney prompts, there’s tons more advanced content on YouTube and beyond.
You can also check out my presentation on Figma for a more visual guide.
Just one last thing before I go, since I have to protect my reputation of meme-maker extraordinaire. If you ever need to create a meme, a fun image for a friend’s birthday, or just have a good laugh, you can also use MidJourney for face swaps.

Check out this other great tutorial on Medium to learn how.
Now, let the MidJourney games begin!
PS. I’m no MidJourney expert, so if you have any tips for me, leave them in the comments. I’d love to hear them!


.jpg)
